
Let’s talk about that half-eaten loaf of bread sitting on your counter. You know the one it’s been there since Tuesday, slowly transforming into a rock-hard decoration. Before you toss it into the compost (or the dog’s bowl), let me whisper a secret: That stale bread is about to become your kitchen’s MVP.
Welcome to the world of homemade breadcrumbs, where “cooking basics” meet “culinary creativity.” As a busy mom or a time-crunched pro, you’ll love how this recipe solves two problems at once: reducing food waste and giving your meals that irresistible crispy topping. Plus, with endless seasoning options, you’ll never settle for store-bought cardboard dust again. Trust me, this is the kind of kitchen magic Amelia (our resident nutrition guru) lives for.
Why You’ll Love This Bread and Crumbs Recipe
Let’s get real: Life’s too short for bland casseroles or soggy chicken tenders. Homemade breadcrumbs are your ticket to crunchier, tastier, and healthier meals. Here’s why they’re a game-changer:
- Zero waste: Rescue stale bread from the trash.
- Budget-friendly: Skip the overpriced supermarket tubs.
- Customizable: Add Italian herbs, smoky paprika, or even vegan Parmesan.
- Kid-approved: Sneak extra nutrients into picky eaters’ meals (whole-grain crumbs, anyone?).
And the best part? You only need 10 minutes of hands-on work.
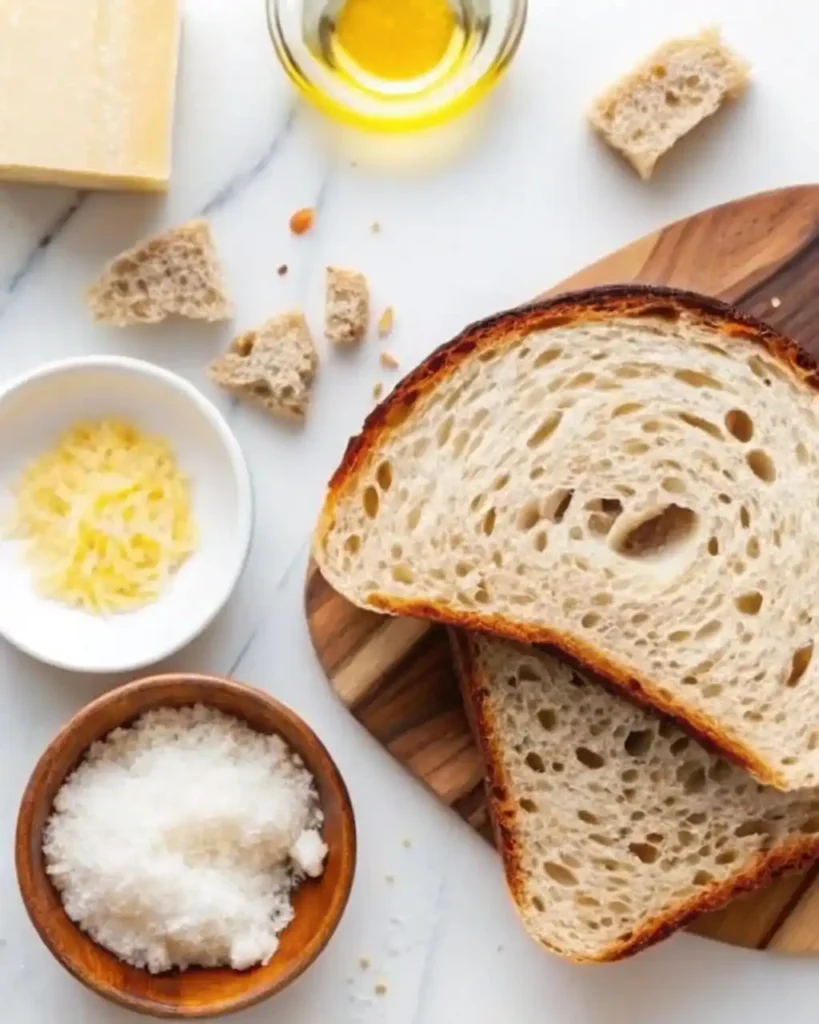
Ingredients You’ll Need
Grab these pantry staples:
- Stale bread: Sourdough’s my favorite, but that whole-grain loaf or gluten-free baguette works too.
- Extra-virgin olive oil: For golden, toasty perfection.
- Salt: Just a pinch to wake up the flavors.
For seasoned crumbs (aka “fancy confetti”):
- Lemon zest (trust me, it’s a vibe)
- Grated pecorino or vegan Parmesan
- Garlic powder, Italian seasoning, or red pepper flakes
Step-by-Step Guide
1. Pulse the Bread
Tear your stale bread into chunks (channel your inner Hulk here) and toss them into a food processor. Pulse until you get your ideal texture fine for breading chicken tenders or chunky for topping soups like our hearty Village Soup.
2. Toast to Perfection
Spread the crumbs on a parchment-lined baking sheet. Drizzle with olive oil, sprinkle with salt, and bake at 350°F for 10–18 minutes. Toss them halfway like you’re flipping pancakes this ensures even browning.
3. Season & Celebrate
While the crumbs are still warm, mix in lemon zest, cheese, or spices. Taste as you go (quality control is key). Pro tip: If you’re using these for crispy air fryer breakfast potatoes, add a dash of smoked paprika!
Seasoning Options for Every Palate
Breadcrumbs are the ultimate blank canvas. Here’s how to jazz them up:
- Italian Night: Garlic powder + dried oregano + vegan Parmesan
- Spicy Kick: Red pepper flakes + smoked sea salt
- Zesty Fresh: Lemon zest + parsley + black pepper
Storytime: My kids once declared store-bought crumbs “too boring” for their chicken tenders and fries. Now, they beg to shake the seasoning jar themselves winning at parenting, one crumb at a time.
Cooking Tips from My Kitchen to Yours
- Bread Hack: No stale bread? Bake fresh slices at 300°F for 10 minutes to dry them out.
- Freeze It: Store crumbs in a zip-top bag for up to 3 months.
- Crispy Upgrade: Toss crumbs in olive oil before topping casseroles or healthy chicken pot pie.
FAQs (Because We’ve All Got Questions)
Q: Can I use gluten-free bread?
A: Absolutely! Just check the texture as you pulse some brands crumble faster.
Q: How long do homemade breadcrumbs last?
A: Up to 2 weeks in the pantry or 3 months frozen. Pro tip: Label the bag unless you enjoy “mystery spice” surprises.
Q: What’s the best way to use them?
A: Sprinkle on mac and cheese, coat salmon bites, or mix into meatballs. They’re also killer on healthy enchiladas!
Wrapping It Up (No Parchment Paper Required)
Next time you spot that lonely loaf, remember: You’re not just making breadcrumbs. You’re crafting a crispy, flavorful secret weapon that turns “meh” meals into “more, please!” moments. Whether you’re breading, topping, or sneaking veggies into kid-friendly recipes, these crumbs are your kitchen’s new best friend.
As Amelia always says, “Good food shouldn’t be complicated it should be joyful.” So go on, give that stale bread a second chance. Your taste buds (and your wallet) will thank you.
P.S. Craving more pantry hacks? Check out our guide to repurposing frozen potatoes or whipping up healthy protein desserts.